
Table of Contents
- Custom 3D Printed Hunting Gear Solutions: What You'll Need
- Step 1: Map Your Setup and Measure Attachment Points
- Step 2: Design or Source Your 3D-Printed Hunting Accessories
- Step 3: Choose Materials and Print Settings for 3D-Printed Hunting Gear Durability
- Step 4: Build a 3D-Printed Saddle Hunting Gear Kit
- Step 5: Field-Test and Inspect Before Hunting Season
- Common Mistakes to Avoid with Custom 3D Printed Hunting Gear Solutions
- Conclusion
- Frequently Asked Questions
Last Updated: October 13, 2026
Custom 3D Printed Hunting Gear Solutions: What You'll Need
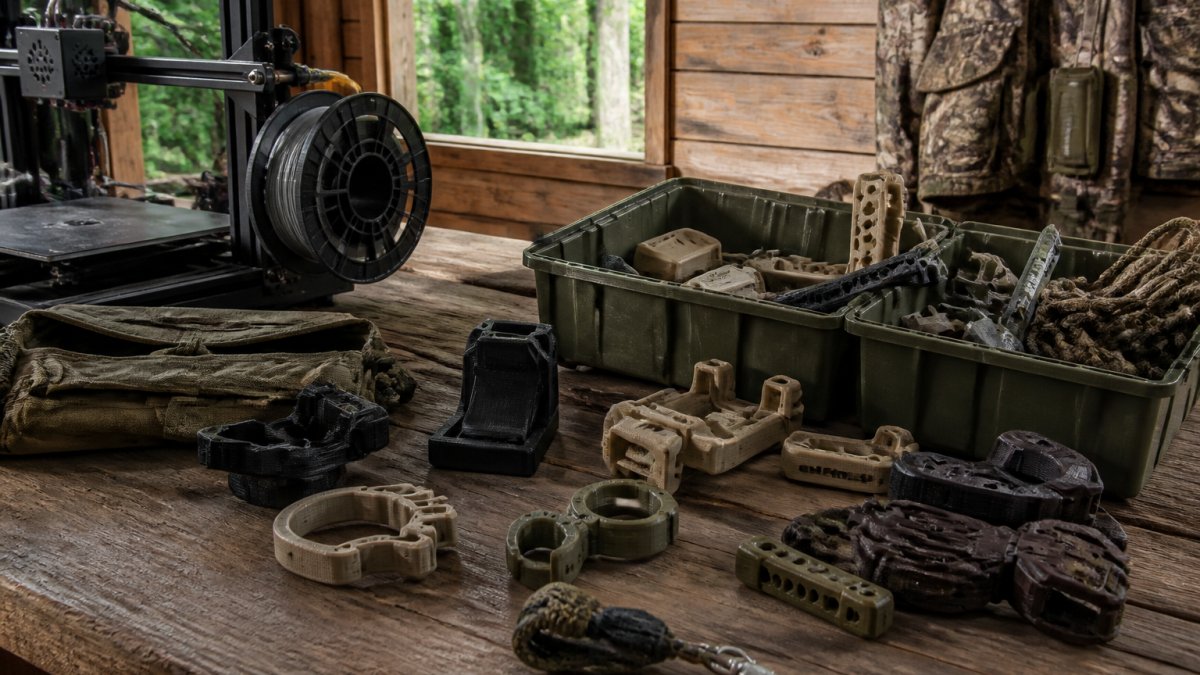
Custom 3D printed hunting gear solutions replace generic accessories with parts built around your exact setup. At 3D Hunting Solutions, we design and print every accessory in-house, so your tree saddle, climbing stick, or bow gets hardware that fits.
Saddle hunting, one-sticking, and backcountry mobile hunting depend on straps, MOLLE loops, and attachment points that vary by hunter. Printed parts match those variables instead of fighting them.
Here's what you'll need before you print anything:
- Calipers or a tape measure for strap widths, loop spacing, and tree diameters
- A 3D printer with at least a 200 x 200 mm build plate
- Filament: PETG for rigid parts, TPU 95A for flexible clips and cinchers
Step 1: Map Your Setup and Measure Attachment Points
Measure first, design second. Skipping this step is the fastest way to print a part that fits nothing.
Lay out your full mobile setup, saddle, lineman's rope, tether, sticks, platform, bow, and quiver, photograph it assembled, then measure every attachment point.
Measuring MOLLE Loops, Straps, and Tree Diameters
MOLLE webbing is not standardized: loop spacing, width, and stitch density vary by brand, so measure your saddle and pack loops rather than trusting a nominal size.
- MOLLE loop width: measure the gap between stitches, not the webbing itself
- Strap width: most pack and saddle straps run 1 inch, but check yours
- Tree diameter: measure at chest height on the trees you actually hunt, then add clearance
Write every measurement down, that list becomes your design brief.
Step 2: Design or Source Your 3D-Printed Hunting Accessories
You can commission a custom fit, depending on how unusual your setup is.
Downloadable Designs vs. Custom Fit Requests
Custom fit requests make sense when nothing off the shelf matches: odd tree diameters, non-standard release models, or an untouched bow configuration.
| Approach | Time to First Part | Best For | Trade-off |
|---|---|---|---|
| Downloadable STL model | Minutes | Standard MOLLE, common tether sizes | May need sanding or shimming |
| Custom fit request | Days | Odd diameters, specific release models | Higher upfront cost |
| Print-and-modify | Hours | Close-but-not-quite fits | Requires basic CAD skills |
For hunters who want a specific fit without learning CAD, custom design services close the gap, we build archery release holsters around your exact release model, not a generic shell that rattles.

Step 3: Choose Materials and Print Settings for 3D-Printed Hunting Gear Durability
Material choice decides whether a part survives a season or fails on the first climb. 3D-printed hunting gear durability comes down to the polymer, print orientation, and layer adhesion, match each material to real conditions and test before the part leaves the bench.
Matching Material to Environment
No single filament wins everywhere. Match the polymer to the worst condition the part will see, not the average.
| Material | Cold (below freezing) | Heat (closed truck, direct sun) | Moisture / Humidity | UV Exposure | Impact | Load-Bearing Suitability | | --- | --- | --- | --- | --- | --- | --- | --- | | PLA | Poor, turns brittle and cracks | Poor, softens well below interior vehicle temps | Poor, absorbs moisture, degrades | Poor, breaks down in sunlight | Low | Not for load-adjacent parts | | PETG | Good, retains toughness | Moderate, can creep under sustained load in heat | Good, low moisture uptake | Good, resists UV better than PLA | Moderate | Light static loads only | | TPU 95A | Excellent, stays flexible | Moderate, softens but recovers | Excellent | Good | Excellent, absorbs shock | Grips and flex parts, not structural | | ASA | Good | Good, higher heat tolerance than PETG | Good | Excellent, built for outdoor exposure | Moderate | Rigid brackets and mounts | | Nylon (PA) | Good | Good | Poor unless dried and sealed, absorbs moisture | Moderate | Excellent | Strongest common option, but moisture-sensitive |
The pattern: PETG for rigid brackets and hooks, TPU 95A for anything that flexes, grips, or cinches, and ASA for parts living outdoors in full sun. Nylon is strongest but demands dry storage, skip it unless you run a dry box.
Environmental Limits You Should Assume
- Cold: PLA shatters on a sub-freezing morning, never use it for freezing temps.
- Heat: A closed vehicle in summer sun softens PLA and pushes PETG toward creep. Don't store loaded PETG brackets in a hot truck cab.
- Moisture: Nylon and PETG absorb humid air; wet filament prints with pops, voids, and weak layer bonds. Dry it and store it sealed.
Print Settings That Actually Matter
Print settings matter as much as filament:
- Layer height: 0.2 mm balances strength and print time; go to 0.12-0.16 mm only for fine features or threads.
- Wall count: 4+ perimeters for load-adjacent parts, walls carry load, infill mostly holds shape.
- Infill: 40-60% for brackets, higher for side loads. Gyroid or cubic resists multi-directional force better than grid.
Test Before You Trust
Do not field a part you have not stressed. A simple bench protocol catches most failures:
- Flex test: bend the part by hand to roughly its working load; listen for cracking and look for whitening at layer lines.
- Hang test: suspend a weight heavier than the gear it will hold, a full water bottle works, for several hours; check for creep, sag, or deformation.
- Drop test: drop the loaded part from waist height onto grass or carpet. TPU should bounce; rigid parts should not crack.
- Temperature cycle: leave it in a hot vehicle for a day, then a freezer overnight, then inspect. Cracks or warping mean the wrong material.
Retire any part showing stress whitening, cracks, or permanent deformation. Printed parts are cheap to reprint; a failure at height is not.
Step 4: Build a 3D-Printed Saddle Hunting Gear Kit
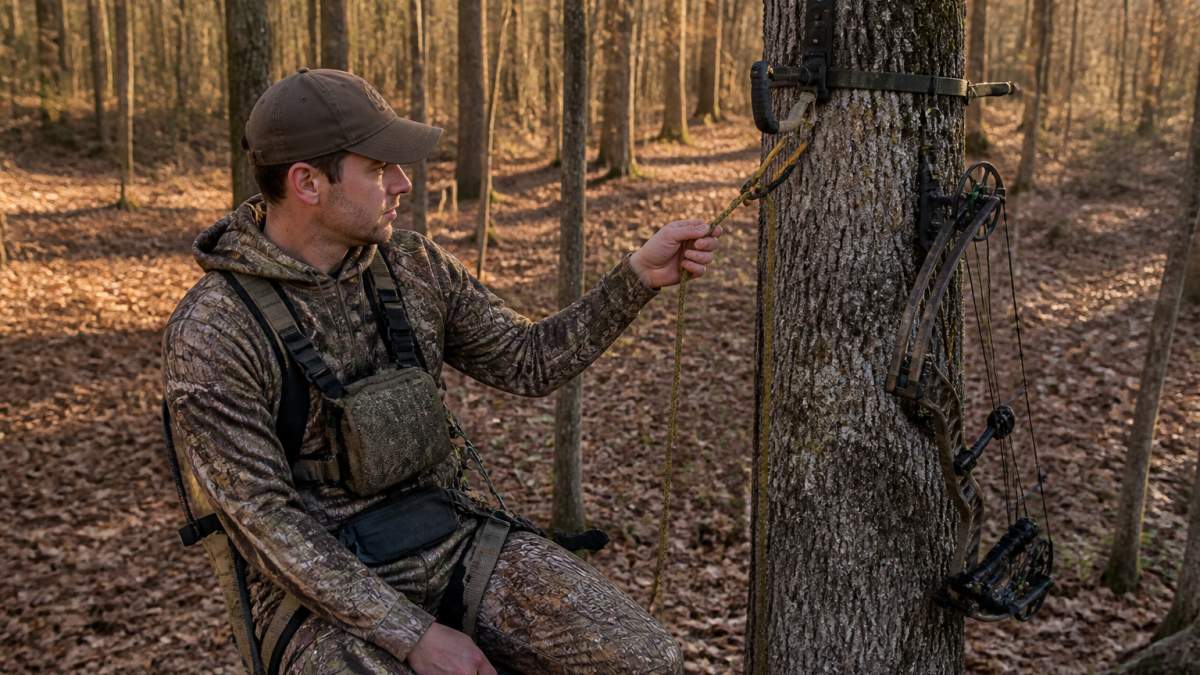
A complete saddle hunting gear kit solves rope management, gear organization, and quick access. Build it around the failures you actually experience in the tree, not a wish list.
Rope Management: Tether Rope Clip
Problem it solves: A tether that slides or creates slack while you shift in the saddle.
Design notes: The clip should grip with light friction, enough to stop sliding, not enough to pinch or abrade the sheath.
Print settings: TPU 95A, 0.2 mm layers, 4 walls, 30-40% infill, printed so the flex direction runs across layer lines.
Disclaimer: It is not weight bearing. It should only hold the tether from moving.
Gear Organization: Multi Function Gear Hook
Problem it solves: Gear scattered across the tree with nowhere consistent to hang it.
Fit measurements you need: MOLLE loop width (the gap between stitches, not the webbing), strap width, and the weight of the heaviest item you plan to hang.
Print settings: PETG or ASA, 0.2 mm layers, 4-5 walls, 50% infill, oriented so the hook's load pulls against solid perimeters rather than between layers.
Aider and Gear Cinchers
Problem it solves: Aiders and ropes that shift, slip, or dangle when you move.
Fit measurements you need: aider webbing width, rope diameter, and the pull force you want to release the cinch.
Design notes: TPU 95A grips without wearing the webbing and bends without cracking.
Print settings: TPU 95A, 0.2 mm layers, 3-4 walls, 25-35% infill. Print slow (20-30 mm/s) and reduce retraction to avoid clogs.
Archery Release Stabilizer Holster
Problem it solves: A thumb release that rattles, falls, or is hard to reach during movement.
Fit measurements you need: your exact release model's body dimensions, the stabilizer's threaded end size (commonly 5/16-24 or 1/4-20, verify yours), and the reach distance from grip to holster.
Design notes: Build the holster around your specific release model, not a generic shell.
Print settings: TPU 95A body, 0.16-0.2 mm layers for thread detail, 4 walls, 30% infill. Print the threaded section vertically so threads are clean.
Rounding Out the Kit
Add a Thermacell Caddy for early-season mosquitoes and a Diaphragm Call Keeper for turkeys. Both hook onto MOLLE, straps, or a pack. Measure the device's footprint and mounting loop first, a caddy that fits one brand's unit may not fit another's.

Compatibility Checklist Before You Print
- Confirm MOLLE loop width on your specific saddle and pack, do not assume 1 inch.
- Confirm tether and lineman's rope diameters with calipers.
- Confirm stabilizer thread size and pitch.
Step 5: Field-Test and Inspect Before Hunting Season
Test every part at ground level before trusting it in a tree. No exceptions.
Hang your full setup at waist height, load each accessory as in the field, and cycle through your normal sequence: climb, set the tether, hang the bow, access gear. Watch for rattle, rotation, and anything that shifts when tugged.
Then inspect before every trip:
- Check layer lines for whitening or cracks
- Confirm stainless hardware is tight and free of rust
- Verify clips still grip after repeated flexing
Common Mistakes to Avoid with Custom 3D Printed Hunting Gear Solutions
Most failures trace back to a handful of repeatable errors. Avoid these and your gear will outlast the season.
- Printing in PLA for cold-weather use. PLA turns brittle below freezing and cracks under load.
- Ignoring print orientation. Layers running parallel to the load direction split first.
- Skipping the ground test. A part that fails at waist height is a warning; the same failure at height is an emergency.
Conclusion
Building a reliable kit takes measurement, the right filament, and honest field testing, and the payoff is gear that fits your setup instead of fighting it. If you'd rather skip the trial and error, 3D Hunting Solutions designs and prints purpose-built accessories in-house, from tether rope clips and gear cinchers to release holsters and camera mounts, all tested by the founder in real hunting conditions.

Frequently Asked Questions
Are 3D-printed hunting accessories durable enough for field use?
It depends on the material and the load. Parts printed in PETG or TPU 95A hold up to weather and repeated handling, which is why brands like 3D Hunting Solutions use them for items such as the Blindside 360 Camera Mount and Aider/Gear Cinchers. The Tether Rope Clip is explicitly not weight bearing and is meant only to stop tether rope from moving. Treat any printed part as a gear organizer unless the maker states a load rating.
What materials are best for 3D-printed hunting gear?
PETG handles outdoor UV exposure and moisture well, which suits camera mounts and caddies. TPU 95A adds flex and grip, so it works for cinchers and holsters that need to hold without wearing the item. Stainless hardware pairs with both.
How do I choose 3D-printed accessories for saddle hunting?
Start with the problems you hit on every climb: tether rope sliding, gear swinging out of reach, or a release buried in a pocket. A Tether Rope Clip at $11.00, a Multi Function Gear Hook at $8.00, and an Archery Release Stabilizer Holster at $17.00 cover those three. Check the attachment method matches your setup, whether that is a 1-inch MOLLE loop, a 3/4-inch strap, or a stabilizer threaded end.
How should I test a 3D-printed hunting accessory before using it in the field?
Rig it at ground level first and load it the way you would in the tree. Hang your pack or bow from the hook, pull the tether clip tight, and cycle the release in and out of the holster a dozen times. Leave it out overnight in the cold, then repeat the checks. Inspect layer lines and hardware for cracks after each session, and retire any part that shows separation.
Getting your setup dialed in before opening day is the hard part, and generic accessories rarely fit the way you need them to. 3D Hunting Solutions builds purpose-built gear for mobile, saddle, and backcountry hunters, with every part designed and 3D printed in-house and field-tested by the founder. Custom design services are available when off-the-shelf sizing won't work. Get started with 3D Hunting Solutions and carry gear that fits your setup from the first climb.