
Table of Contents
- What You Need Before You Attach Bow to Saddle
- Step-by-Step: How to Attach Bow to Saddle
- Best Bow Hanger for Saddle Hunting: What to Look For
- How to Haul Bow Up Tree Without Noise or Snags
- Saddle Hunting Bow Management: Keeping Your Setup Accessible
- Noise Reduction and Weather-Proofing Your Attachment
- Common Mistakes to Avoid When Attaching Bow to Saddle
- Frequently Asked Questions
Last Updated: September 14, 2026
What You Need Before You Attach Bow to Saddle
Knowing how to attach bow to saddle starts with one hard truth: your bow is the heaviest, most awkward piece of gear you'll manage 20 feet up, and a rig that works fine on the ground can fail you at full draw. This guide from 3D Hunting Solutions covers the exact hardware, knots, and sequence needed. Get the foundation right and the rest is simple.
Before you climb, gather these:
- Bow hanger or gear hook with a 3.5-inch gap (enough clearance for most risers and split limbs)
- Daisy chain gear strap or a section of Amsteel cordage
- One or two locking carabiners for the tether and hanger connection
- Prusik knot or friction hitch cord for tether adjustment
- Your saddle, tether, and bridge, already set and weight-tested
- A haul line for pulling the bow up after you're settled
The single most common mistake is arriving at the tree with a hanger that doesn't match the strap you brought. Verify compatibility before you leave the truck.

Step-by-Step: How to Attach Bow to Saddle
The full process takes about five minutes once your saddle is set. Work in this order: rig the strap, mount the hanger, connect the tether, then haul and hang the bow. Skipping ahead to the bow before the strap is secure is where most setups go wrong.
Step 1: Rig the Daisy Chain and Gear Strap
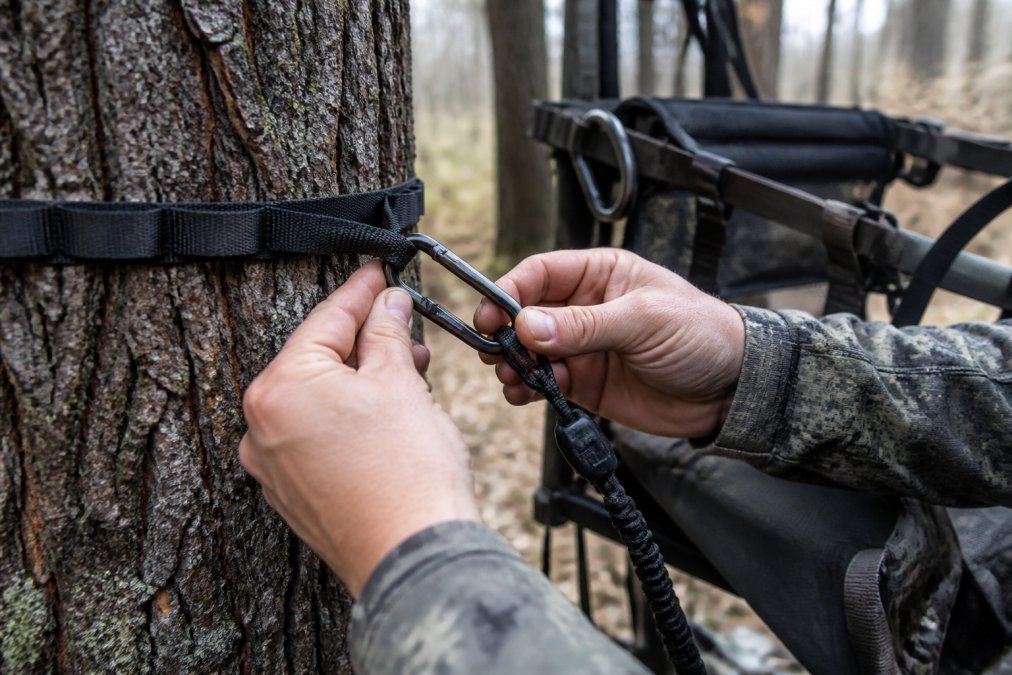
A daisy chain is a length of cordage or webbing with loops spliced at set intervals, letting you clip gear at fixed points without tying knots in the dark. Wrap it around the trunk at roughly chest height, about 48 to 54 inches above your platform, feed the working end through the top loop, and cinch it snug against the bark.
Two rigging details separate a quiet setup from a noisy one:
- Set the loop spacing to your reach. Standard daisy chains run 4 to 6 inches between loops. If your loops are wider than your hand span, you'll be fishing for a clip point instead of grabbing it.
- Cinch, then dress. Pull the wrap tight and work the slack out of each loop so nothing dangles. A loose loop slaps the trunk every time the wind moves the tree.
For public land, use a strap-on or rope-based system. Screw-in steps and anything that penetrates bark are restricted or banned on many public tracts, so check your local regulations before you climb (fs.usda.gov).
Step 2: Mount the Bow Hanger
Clip the hanger onto a daisy chain loop or directly onto your gear strap. Two adjustments matter here:
- Angle the hook slightly upward, roughly 10 to 15 degrees above horizontal, so the bow rests back against the trunk instead of swinging free.
- Position it on the side of the tree your draw hand naturally falls to. For most right-handed shooters that's the 2 o'clock position relative to the trunk as you face it.
Step 3: Set the Tether and Bridge
Set your tether above the hanger, attach your bridge with a locking carabiner, and adjust the prusik knot so you can reach the hanger at full extension without standing. A prusik grips when loaded and slides when you break it by hand, that's what lets you fine-tune height from the saddle instead of climbing up and down.
Step 4: Load-Test Before You Lift the Bow
This is the step most hunters skip. Before the bow ever leaves the ground:
- Clip the hanger to the strap and hang a weighted pack or your bow case from it.
- Bounce it lightly. If the hanger rotates, the loop is too wide or the clip isn't seated.
- Sit back into your tether and bridge and confirm the prusik holds under body weight.
- Reach for the empty hanger from your seated position. If you have to lean or twist, move it before you haul.
Step 5: Haul and Hang the Bow
Attach your haul line above the rest and below the sight so the bow rises flat and vertical. Pull hand-over-hand with steady tension, stop before the bow clears your platform, then reach down and guide it onto the hanger. Keep the string facing away from the trunk the whole way up.
Troubleshooting the Attachment
| Symptom | Likely Cause | Fix |
|---|---|---|
| Bow swings into trunk | Hook angled down or loop too wide | Re-angle hook upward, cinch the loop |
| Hanger rotates under load | Strap mismatch or clip not seated | Verify strap width, reseat carabiner |
| Can't reach bow seated | Hanger mounted too low | Raise 2-4 inches, re-test reach |
| Prusik slips | Wrong cord diameter for tether | Match hitch cord to tether spec |
| Noise on draw | Metal-on-metal contact | Wrap gate and contact points |
Best Bow Hanger for Saddle Hunting: What to Look For
The best bow hanger for saddle hunting balances three things: a wide enough gap to hold your bow securely, a connection that fits your existing strap, and materials that survive cold and moisture. A 3.5-inch gap fits most risers and split-limb designs (Frequently Asked Questions).

Here's how the common options compare:
| Hanger Type | Best For | Strap Compatibility | Trade-off |
|---|---|---|---|
| Open hook | Quick on/off in the dark | Gear strap, MOLLE, HYS | Bow can lift off if bumped |
| Closed loop | Security on rough terrain | Amsteel or gear strap | Slower to load one-handed |
| Split-limb design | Slim-profile bows | Up to 1-inch strap | Not ideal for wide risers |
| Amsteel rope hanger | Minimalist pack weight | Ties direct to trunk | Requires knot skill |
3D Hunting Solutions makes several of these in-house, 3D printed: the Amsteel Bow Hanger at $14.00, the Bow Hanger Gear Strap at $14.00, and the Split Limb Bow Hanger at $10.00. Each fits up to a 1-inch gear strap, so they integrate with gear you already own rather than forcing a rebuild.

How to Haul Bow Up Tree Without Noise or Snags
Hauling a bow up a tree quietly comes down to three things: a smooth-release knot, a bow that stays vertical, and a haul line that doesn't drag through brush. Attach the line above your rest and below your sight so the bow rises flat.
Slow, steady pulls beat fast ones. A bow that swings into the trunk makes far more noise than a slow lift.
- Use a haul line with a quick-release clip, not a tied loop
- Pull hand-over-hand with steady tension
- Stop before the bow clears your platform, then reach down and guide it
- Keep the string facing away from the trunk the whole way up
Saddle Hunting Bow Management: Keeping Your Setup Accessible
Saddle hunting bow management is about reach and repeatability. Your bow should sit where your draw hand finds it without you shifting your hips or standing up. If you have to lean or twist to grab it, you'll miss the shot window.
Set the hanger at the height where your hand naturally falls when seated in the saddle. Keep your release, rangefinder, and grunt call on the same side as your draw hand so nothing crosses your body during a shot.
For weight distribution, keep heavy items low and close to the tree. A top-heavy pack or a bow hung far out from the trunk pulls your center of gravity off the platform and makes the whole setup feel unstable.
Noise Reduction and Weather-Proofing Your Attachment
Quiet, weather-resistant attachments come down to contact points and materials. Metal-on-metal clinks and hard plastic against bark are the two biggest noise sources in a saddle setup, and both get worse in cold, dry air when materials stiffen and clearances open up. This is the part of the setup most guides skip, and it's the part that decides whether a mature buck hears you before you see him.
Silencing Metal-on-Metal Contact
Every carabiner gate, hanger hook, and clip point is a potential tuning fork. Work through them one at a time:
- Wrap carabiner gates and contact points with felt or self-fusing silicone tape. Felt deadens the ring; silicone tape stays put in wet conditions where felt peels.
- Choose felt-covered or rubberized hooks where the hanger meets the bow's riser or limb.
- Isolate the hanger-to-strap connection. A carabiner clipped directly to a metal loop transmits vibration straight into the trunk. A short cord loop between them breaks the path.
- Check for loose hardware. A hanger bolt backed out a quarter turn will rattle on every wind gust. Blue threadlocker on any threaded connection stops it.
- Test in gloves. A connection that feels solid bare-handed can feel vague through a glove, and vague means you'll fumble it at first light.
Keeping Attachments Functional in Cold and Wet
Moisture stiffens webbing, corrodes hardware, and makes knots harder to adjust with cold hands. A few material choices prevent most of it:
- Use cordage that doesn't stiffen in cold. Amsteel (Dyneema) stays supple well below freezing, where nylon and some polyesters get board-stiff and won't dress cleanly (dsm.com).
- Avoid bare aluminum-on-aluminum contact in freezing rain. It galls and can seize. Anodized or coated hardware releases cleanly.
- Dry your strap and hanger after every wet hunt. Mildew weakens webbing over a season, and a damp daisy chain freezes into a solid block overnight.
- Lubricate carabiner gates sparingly with a dry film lubricant, not oil. Oil attracts grit and thickens in cold.
A Cold-Weather Pre-Season Check
Run this once before the season, in the coldest conditions you expect to hunt:
- Leave your full attachment setup outside overnight.
- Rig it with gloves on in the morning.
- Listen for any click, rattle, or scrape as you clip, adjust, and remove the bow.
- Fix every noise source at home, not in the dark.
Common Mistakes to Avoid When Attaching Bow to Saddle
Most attachment failures trace back to four errors. Fix these and your setup will hold up season after season.
- Wrong strap size: A hanger rated for up to a 1-inch strap won't grip a wider one. Mismatches cause swing and noise.
- Mounting too low: A hanger at chest height forces you to stand to reach the bow, exposing your silhouette.
- Skipping the weight test: Always load the tether and hanger with body weight before hauling the bow.
- Ignoring public land rules: Screw-in attachments damage bark and are restricted on many public tracts. Use strap-on systems and check local rules.
If you already run a dialed-in setup from other brands, most of these hangers work with standard gear straps and MOLLE webbing, so you can integrate without replacing everything.
A saddle setup only works as well as its weakest connection, and the bow attachment is usually it. 3D Hunting Solutions designs and 3D prints every hanger in-house, with field-tested durability for mobile and backcountry hunters. Shop the Amsteel Bow Hanger, the Gear Strap Bow Hanger, or the Split Limb Bow Hanger and build a setup that stays quiet, secure, and within reach. Get started with 3D Hunting Solutions and hunt with gear that holds up when it counts.
Frequently Asked Questions
What is the best bow hanger for saddle hunting?
The best bow hanger for saddle hunting depends on your setup. For Amsteel or rope users, the Amsteel Bow Hanger ($14) offers a 3.5-inch gap and secure hold. If you use a gear strap or MOLLE system, the Bow Hanger - Gear Strap ($14) or Split Limb Bow Hanger ($10) fits up to a 1-inch strap. Look for durable materials and a design that keeps your bow accessible without adding bulk.
How do you keep your bow accessible while in a tree saddle?
Mount a bow hanger on your gear strap or daisy chain at eye level or slightly above. Position it so you can grab the bow with minimal movement. Use a tether or carabiner to secure the hanger to your saddle's bridge or a tree strap. This keeps the bow within arm's reach and reduces noise when you need to draw.
Can you attach a bow directly to the saddle platform?
You can attach a bow to the saddle platform using a gear strap or a dedicated bow hanger that fits around the platform's edge. However, this may limit accessibility. Most hunters prefer mounting the hanger on a separate gear strap or daisy chain attached to the tree, keeping the bow at a comfortable height and away from foot traffic.
What are the benefits of using a 3D-printed bow hanger?
3D-printed bow hangers are lightweight, durable, and designed for specific setups like saddle hunting. They often feature custom fits for gear straps or Amsteel, reducing movement and noise. In-house printing allows for quality control and field testing. Many hunters find they integrate seamlessly with existing gear, offering a tailored solution without the bulk of traditional metal hangers.