

Table of Contents
- Why a Thumb Release Holster Beats a Pocket or Pouch
- Archery Release Stabilizer Holster: Mounting Directly to the Bow
- Handheld Release Holster Options for Packs, Bino Harnesses, and Belts
- How to Carry a Bow Release While Hunting: Matching the Method to the Hunt
- Retention, Fit, and Draw: Testing a Thumb Release Holster in the Field
- Mounting-Position Trade-Offs and Field-Use Performance
- Conclusion
- Frequently Asked Questions
Last Updated: October 20, 2026
Why a Thumb Release Holster Beats a Pocket or Pouch
A thumb release holster is a dedicated carrier that keeps a handheld release secured to your body or bow, so the release is always in the same place when a shot presents itself. At 3D Hunting Solutions, we build these carriers because we got tired of watching hunters dig through pockets at the worst possible moment.

Pockets and pouches fail in three predictable ways. They bury the release under gloves, tags, and snacks. They let the release rattle against other gear. And they force you to look down and search, which is exactly the movement a pressured animal catches.
A holster fixes all three. The release sits in one fixed spot, held by a retention system, and your hand learns the path to it. That muscle memory matters more than any single piece of gear in your setup.
Archery Release Stabilizer Holster: Mounting Directly to the Bow
The archery release stabilizer holster is the cleanest option for hunters who want the release attached to the bow itself. It mounts using the stabilizer's threaded end, so it works on nearly any bow setup without drilling, strapping, or modifying the riser.

Our Archery Release Stabilizer Holster for Thumb Releases is printed in TPU, a rubber-like material that grips the release without wearing it down. A bungee-and-knob system holds the release secure during movement.
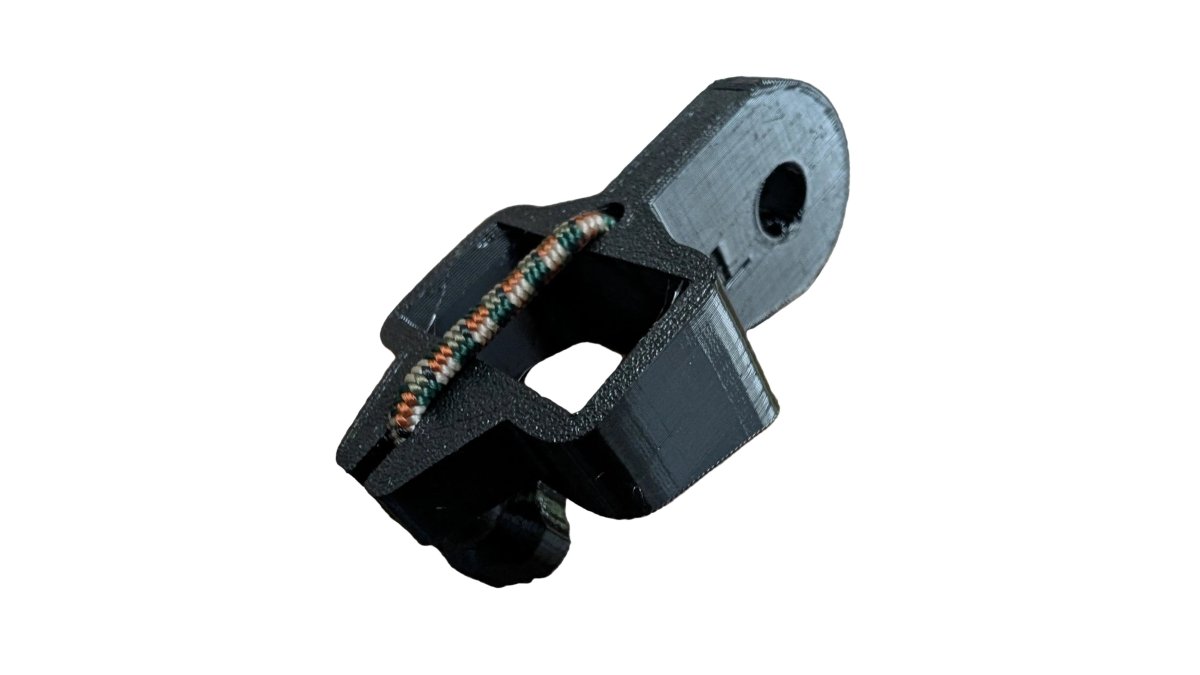
Here is the trade-off nobody mentions: bow-mounted carry puts the release in your hand the moment you grab the bow, but it also adds a small amount of weight forward and can catch on brush during a stalk.
Handheld Release Holster Options for Packs, Bino Harnesses, and Belts
A handheld release holster does not have to live on the bow. For saddle hunters and backcountry hunters, body-mounted carry is often the better answer because the release stays with you even when the bow is hanging or strapped to a pack. The real decision is not whether to mount to your body, but which body position wins for how you hunt.
Our Archery Release Bino / Pack Molle Holster for Thumb Releases attaches to any 1-inch MOLLE loop on a pack, bino harness, or saddle. It is printed in rugged PETG with a TPU 95A knob and a durable bungee, and it costs $17.00.

Where it fits best:
- Bino harness: chest-level access, ideal for spot-and-stalk
- Pack MOLLE webbing: keeps the release off your waist during long hikes
- Saddle: accessible while tethered, without reaching for a pocket
- Belt: simple, familiar, and easy to reach while seated
The bino harness mount is the one most hunters overlook, and it is usually the fastest access point of all. Your hand is already at chest height when you range an animal.
Mounting-Position Trade-Offs, Side by Side
Most product pages list attachment points without telling you what each one costs you. Here is the comparison that matters when you are choosing a single carry position.
| Mount | Access speed | Interference risk | Comfort on long hikes | Best for |
|---|---|---|---|---|
| Bino harness (chest) | Fastest, hand already at chest height | Can crowd a rangefinder pouch or binocular body | Low, weight stays centered | Spot-and-stalk, still hunting |
| Pack MOLLE (side or front) | Moderate, depends on strap routing | Can catch on shoulder straps when shouldering the pack | Low to moderate | Backcountry multi-day |
| Saddle (MOLLE loop) | Fast while tethered | Limited mounting real estate on some saddles | Not applicable, seated | Saddle and treestand |
| Belt | Moderate, awkward while seated | Can dig in under a pack waist belt | Moderate | Ground blind, simple setups |
| Stabilizer (bow) | Fastest to the string | Adds forward weight and snag risk in brush | Moderate, weight forward | Bow-mounted preference |
A common pattern is that hunters who cover miles end up on pack MOLLE or bino harness, while hunters who sit still end up on saddle or belt. If you run a Bridge Lock stabilizer system, our Bridge Lock Stabilizer Release Holster for Thumb Releases slides into any open Bridge Lock slot, works for right- and left-handed shooters, and also runs $17.00.
How to Carry a Bow Release While Hunting: Matching the Method to the Hunt
How to carry a bow release while hunting depends on how you move. Treestand and saddle hunters sit still and need quiet, one-handed access. Backcountry hunters cover miles and need the release protected from brush, rain, and dust. Ground hunters need it out of the way but instantly available.
A simple decision framework:
| Hunt Style | Best Carry Method | Why |
|---|---|---|
| Saddle or treestand | MOLLE holster on saddle or pack | Quiet access while tethered |
| Spot-and-stalk | Bino harness mount | Chest-level, silent draw |
| Backcountry multi-day | Pack MOLLE, secured | Protected from brush and weather |
| Bow-mounted preference | Stabilizer holster | Release travels with the bow |
| Ground blind | Belt mount | Reachable while seated |
If you run a Bridge Lock stabilizer system, our Bridge Lock Stabilizer Release Holster for Thumb Releases slides into any open Bridge Lock slot, works for right- and left-handed shooters, and also runs $17.00.
Retention, Fit, and Draw: Testing a Thumb Release Holster in the Field
Field testing a thumb release holster comes down to three checks: does it hold, does it fit, and does it release cleanly. Run all three before you trust it in the timber. Competitors describe retention in general terms; here is a repeatable method you can run in your garage or backyard in about ten minutes.
Fit: Match the Holster to Your Release Body
Thumb-button releases vary in body size, jaw shape, and barrel diameter, and standard and mini releases do not sit the same way. Most holsters are designed around common thumb release profiles, and custom sizing is available when yours does not fit.
Archery Release Stabilizer Holster for Thumb Releases →
A practical fit check:
- Seat the release fully. The body should bottom out in the holster without the jaw or barrel contacting the mount.
- Check side-to-side play. A small amount of rock is normal; more than about 1/8 inch of movement at the body means the holster is too loose for that release.
- Check the knob and bungee. The bungee should tension the release against the holster body, not squeeze the jaws or trigger guard.
- Confirm the release cannot fire in the holster. The trigger and jaw must stay clear of the holster walls so nothing can actuate the release while carried.
If your release is a mini or a compact body, expect a different seat depth than a full-size thumb release. Note your release model and body dimensions before ordering, and ask for custom sizing if the standard profile is a loose fit.
Retention: A Repeatable Shake and Pull Test
Retention is described on most product pages but rarely tested. Use this method:
- Shake test. Load the release, hold the holster by its mount, and shake firmly for ten seconds in three orientations, upright, inverted, and sideways. The release should stay seated without you touching it.
- Pull test. With the release seated, pull straight out with light finger pressure. It should release cleanly with a deliberate pull, not fall out under its own weight.
- Bump test. Tap the holster body against your palm from the side. A rattle or shift means the bungee or knob needs adjustment.
If the release shifts in the shake test, tighten the bungee or knob a quarter turn and repeat. If it still shifts, the holster is the wrong size for that release body.
Draw: The Blind, Gloved Test
With gloves on, remove the release five times in a row without looking. If you fumble, the mounting position is wrong, not the holster. Time the five draws and note any that require a second grab, those are the positions that fail in low light.
Noise and Field Performance
Noise matters too. A loose release rattling against a metal buckle will spook animals at close range. TPU and PETG bodies dampen that contact noise far better than a bare release knocking around a pouch. A common pattern is that the bungee-and-knob interface is the first place grit and sap collect, so wipe it down after muddy or dusty hunts and check the bungee for fraying before each season.
Mounting-Position Trade-Offs and Field-Use Performance
Every mounting position trades something. Bow-mounted carry is the fastest to the string but adds forward weight and snag risk. Chest-mounted carry is quiet and accessible but can interfere with a binocular or rangefinder pouch. Belt carry is simple but awkward while seated in a saddle.
Durability is the other variable. TPU stays flexible in cold weather and grips without scratching, while PETG holds its shape under load. Both handle wet conditions, but rinse and dry any holster after a muddy hunt to keep the bungee and knob working smoothly.
A few habits that extend holster life:
- Check the bungee for fraying before each season
- Keep the knob clean of grit and sap
- Store the release out of the holster in the off-season to preserve tension
- Re-check mounting screws after long drives or flights
Conclusion
The hardest part of release carry is not buying a holster. It is committing to one mounting position and drilling the draw until it is automatic. Hunters who skip that step end up back in their pockets by mid-season.
We built our holsters to solve exactly that problem. Every 3D Hunting Solutions carrier is designed and 3D printed in-house, tested in real hunting conditions, and priced at $17.00 so you can equip more than one setup. Custom sizing is available if your release does not fit a standard profile.
Get started with 3D Hunting Solutions and put your release exactly where your hand expects it.
Frequently Asked Questions
What is a thumb release holster used for?
A thumb release holster holds your handheld release when you are not at full draw, so it stays off your wrist and out of a loose pocket. It keeps the release secure during climbing, walking, and glassing while putting it within reach for a shot. Holsters mount to a bow stabilizer, a 1-inch MOLLE loop on a pack or bino harness, or a belt, depending on your setup. For mobile and saddle hunters, that means less fumbling and a repeatable draw every time.
Are thumb release holsters compatible with different release models?
Fit depends on the holster's opening and retention system. A bungee-and-knob design like the ones from 3D Hunting Solutions grips the release body without scratching it, and TPU construction flexes to accommodate standard and mini release sizes. Listings name common models such as Scott, Carter, Stan, and UltraView, and custom sizing is available if your release falls outside those dimensions. Measure your release body before ordering, and ask about a custom fit if you run an unusual model.
Can you attach a thumb release holster to a bow stabilizer?
Yes. Stabilizer-mounted holsters use the threaded end of the stabilizer or slide into an open Bridge Lock stabilizer slot, giving you a low-profile attachment point that works for right- and left-handed shooters. The 3D Hunting Solutions stabilizer holster and Bridge Lock version both cost $17.00 and use a bungee-and-knob retention system. Stabilizer mounting keeps the release on the bow itself, which suits hunters who want one less item on their pack.
How do you keep a thumb release secure and easy to reach while hunting?
Pick a mounting position you can reach without looking, then set retention so the release stays put during a climb but pulls free with one hand. A bungee-and-knob system lets you adjust tension; test it with gloves on before the season. MOLLE-mounted holsters on a bino harness or pack keep the release at chest level, while stabilizer mounts keep it on the bow. Practice the draw from your chosen position until removal is automatic.